Kali Linux distributions are used to test the security of WiFi networks, websites, and servers, among other things. Operating systems like Debian and Ubuntu are also commonly utilized for these purposes. ProxyChains and Tor can be used to chain many proxies and provide anonymity, making it more challenging to track down your actual IP address. As a result, ProxyChains hides your genuine IP address by using many proxy servers. Remember that the more proxies you use, the slower your Internet connection will become.
What are ProxyChains?
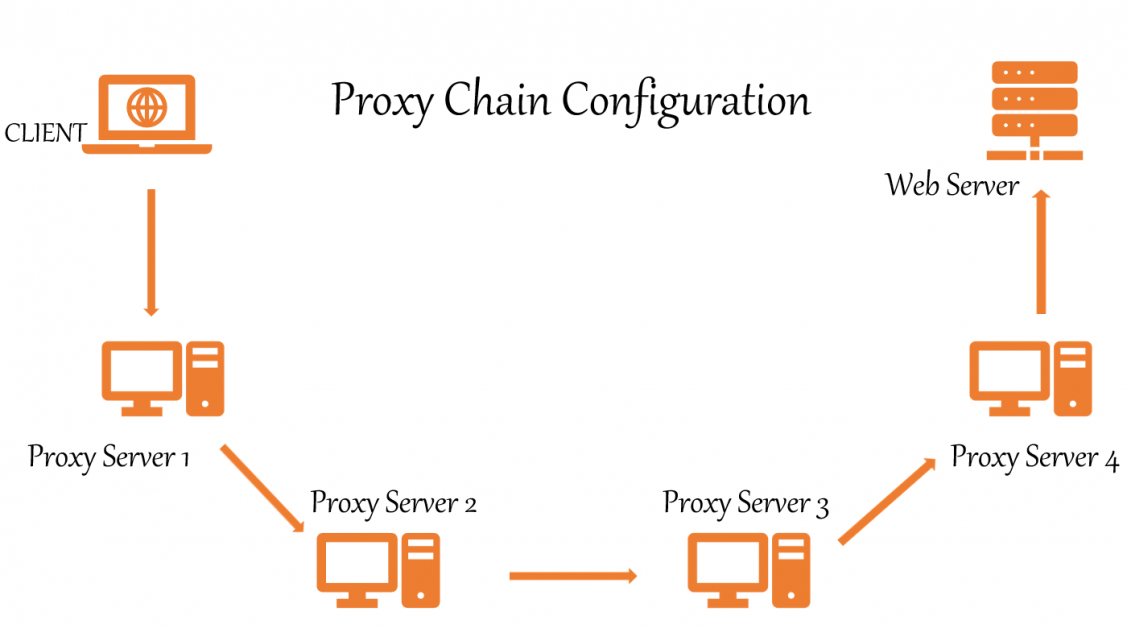
Proxychains is a UNIX program that allows us to mask our IP address by redirecting network traffic. It routes our TCP traffic through a variety of proxies, including TOR, SOCKS, and HTTP.
TCP reconnaissance tools such as Nmap are compatible. Allows any TCP connection to be forwarded to the internet via a series of configurable proxies. The Tor network is used by default. Within a list, it’s possible to mix and match different proxy kinds. Proxychains can also be used in evading firewalls, IDS, and IPS detecting.
Proxy chaining is simple and may be accomplished by anyone, as demonstrated in this article. This guide will show you how to set up Tor and Proxychains in Linux for anonymity.
Installing Tor & Proxychains in Linux
First, update the Linux system with the patches and the latest applications. For this we open a terminal and type: Then check whether Tor and Proxychains are pre-installed or not by simply typing these commands separately : If they were not installed, type the following command in the terminal: Please note that we’re not installing the Tor browser. We’re installing the tor service which is a service that runs locally on your virtual machine or on your operating system and is actually bound to a particular port on local-host. In our case, it’s going to be 9050 and that’s the default with the tor service. To check the status of Tor : To start the tor service : To stop the tor service :
Configuring ProxyChains
First, locate the directory of ProxyChains by using this command : This is our configuration file. Based on the above result, we can notice that the ProxyChain config file is located in /etc/. We need to make some adjustments to ProxyChains configuration files. Open the config file in your favorite text editor like leafpad, vim, or nano. Here I am using nano editor.
The config file is opened. Now you need to comment and comment out some lines to set up the proxy chains. You’ll notice “#” in the configuration, which stands for bash language comments. You may scroll down and make the adjustments using the arrow keys. #1. Dynamic chain should be removed from the remark comment. All you have to do is to remove a # in front of dynamic_chain. #2. Put the comment in front of random_chain and strict_chain. Just add # in front of these. #3. Max times it includes the proxy-DNS uncomment, double-check that it is uncommented. You will avoid any DNS leaks that may reveal your true IP address in this manner. #4. Add socks5 127.0.0.1 9050 in the proxy list the last line. Here socks4 proxy will be already given. You need to add the socks5 proxy as shown above. And finally, save the config file and exit the terminal.
Usage of ProxyChains
At first, you have to start the Tor service in order to use ProxyChains. After the tor service is started, you can use ProxyChains for browsing and for anonymous scanning and enumeration. You can also use Nmap or sqlmap tool with ProxyChain for scanning and searching exploits anonymously. It’s great, right? To utilize ProxyChains, simply type the ProxyChains command in a terminal, followed by the name of the app you want to use. The format is as follows: To use Nmap: To use sqlmap: You can also test for exploits anonymously like Literally, Every TCP reconnaissance tool can be used with ProxyChains. For the final confirmation of ProxyChains is working properly or not, just go to dnsleaktest.com and check your IP address and DNS leaks. After running ProxyChains, you will notice that Firefox has been loaded with a different language. Now, let’s perform a DNS leak test by using a command :
As you can see, my location has shifted from INDIA to PAKISTAN, and the good news is that ProxyChains continuously changing my IP address in a dynamic manner, ensuring that my anonymity is maintained. If you wish to see a new result, simply close Firefox, clean the terminal, restart the Tor service and launch ProxyChains again. In the DNS leak test, you’ll see a variety of outcomes, as illustrated below.
Again you can see that my location has shifted from Pakistan to Russia. This is how dynamic chain proxies work. It increases the chances for more anonymity while hacking.
Conclusion 👨💻
We learned how to remain anonymous on the internet and protect our online privacy while pentesting. ProxyChains can also be used in conjunction with security tools such as Nmap and Burpsuite, and they are frequently used in evading IDS, IPS, and firewall detection. Alternatively, if you are looking for a quick and easy setup solution then you may consider using a VPN that anonymizes traffic out of the box.
![]()
![]()


![]()
![]()
![]()
![]()

![]()


![]()
![]()
![]()

